
This artical is a quick introduction into setting up the Gemini API client SDK on Android to perform Optical Character Recognition (OCR) on images.
Let’s jump straight in:
The Gemini API gives you access to the latest generative AI models from Google. Gemini is a series of multimodal generative AI models developed by Google. Gemini models can accept text and image in prompts, depending on what model variation you choose, and output text responses.
https://ai.google.dev/docs/gemini_api_overview
In my loft I have some networking equipment, and I monitor for anomalies in the power consumption and loft environment. I have setup a camera which is pointed at a power monitor and a thermometer. It looks like this:
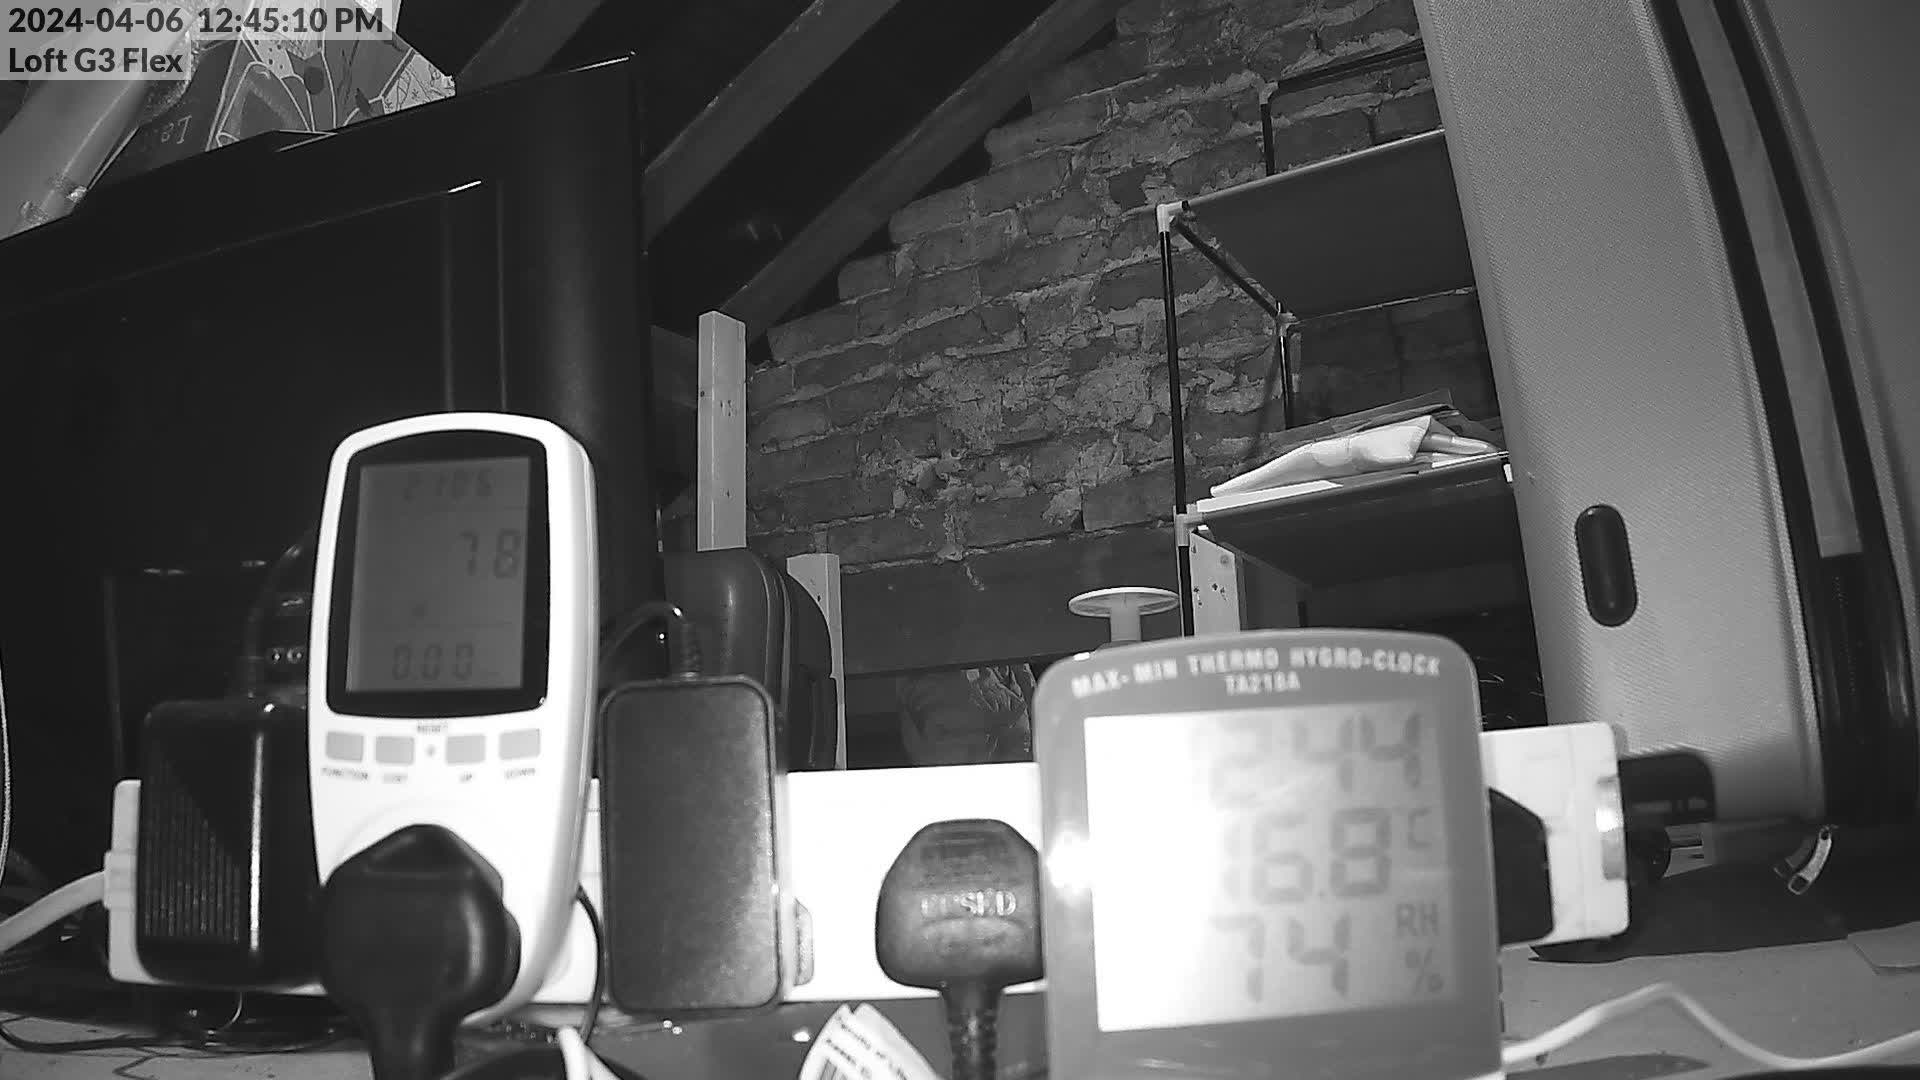
I check this manually when I have other networking issues and want to eliminate the loft environment. But wouldn’t it be great to automate this!
With the Gemini API you can pass it an image and ask it questions about what is in the image, so let’s use this automate the detection of high temperatures or increased power consumption.
Pre-requisite of using the Gemini is accessing it from a non-european country (basically but not entirely accurate), as Google have released it publicly but are still working out the fine details with some countries/regions lawyers (the correct list of availability is here).
First thing to use the API is to get yourself an API key, you get that here (see pre-requisite paragraph above if the URL isn’t working for you *cough* use a vpn *cough*). Getting an API key and ensuring it is available in your application is handily explained here. When reading the code below, if you are confused where the BuildConfig api key comes from, refer back to this page.
When using the Gemini API on Android a client SDK is offered. It’s Gradle coordinates are:
com.google.ai.client.generativeai:generativeai
Step one is adding that to your build.gradle. I added it using a TOML reference:
app/build.gradle:

implementation(libs.google.ai.client.generativeai)

gradle/libs.versions.toml:

generativeai = "0.2.2"
google-ai-client-generativeai = { module = "com.google.ai.client.generativeai:generativeai", version.ref = "generativeai" }
Now that you can access the client sdk, you can create a GenerativeModel object. This is what allows you to generate content, as in, this is the class that you can pass images and ask questions to get a text response.
There are multiple Gemini models that you can access (a list is here), when only asking questions (sending text prompt) and receiving a reply, you can use the “gemini-pro” model. However when wanting to send images to Gemini you need to use the “gemini-pro-vision” model.
Setup your Gemini GenerativeModel like so:
private val modelName = listOf(
    "gemini-pro",
    "gemini-pro-vision",
)
val generativeModel = GenerativeModel(
modelName = modelName[1],
apiKey = BuildConfig.apiKey,
)(Reminder, that BuildConfig.apiKey is explained here.)
Once you have the model class, its a matter of passing it inputs and receiving the text response output. This client does a network request and so needs to be ran on a background thread, it also comes with quota’s and safety mechanisms for its use.
For the sake of this tutorial, we have put the image we want the LLM to analyse into the /resources/drawable folder, and we load that into a bitmap in a typical Android way:
bitmap = BitmapFactory.decodeResource(resources, R.drawable.image)
Crafting the request for an LLM (the “prompt”) is half of the battle for getting a good response, and you should consider how you want to ask and what you want the response to look like. There are some great tips here. For us, we want to extract some text from the image, and I went with:
“Extract the power consumption (in watts), temperature (in degrees celsius) and relative humidity (RH %) from the image. Answer in bullet points.”
This gives clear instructions to the Gemini LLM as to what information we need, what units the information is in and how to answer in a succinct manner.
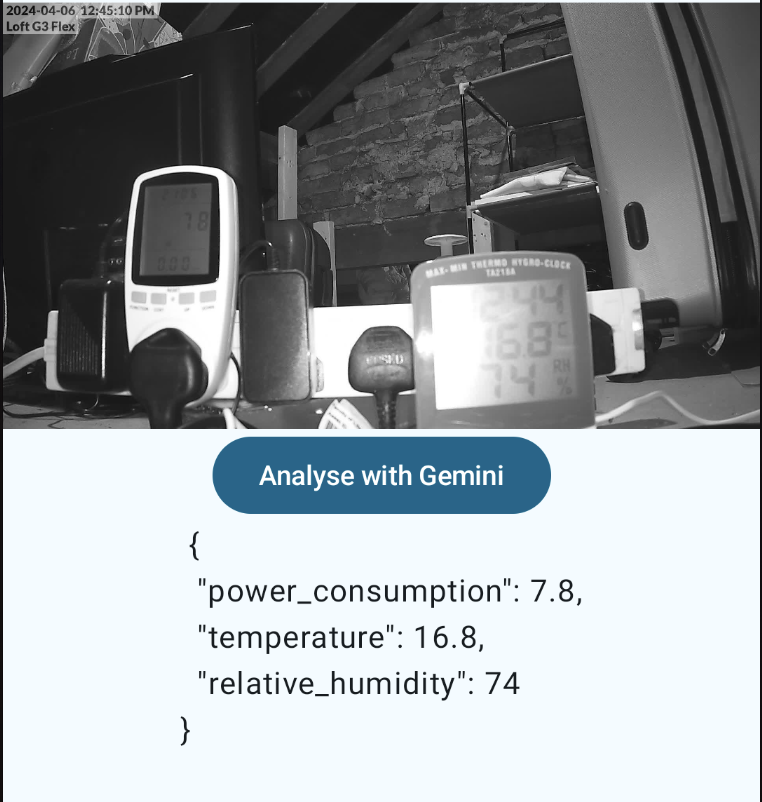
This is going to give us a response that makes sense to present to a user as an Android UI, but for automation, consider you could alternatively ask “Answer with a JSON object.” and then use that for further analysis. As a side, I did that, and here is the outcome:
Once you have crafted your text input and have your bitmap, you combine them into a content object and call generateContent on the model, then politely wait for the response. It comes together like this:
 private suspend fun analyseImage(image: Bitmap, question: String): String {
        val generativeModel = GenerativeModel( // For the blog, this is here but there's typically no need to recreate the model every time
            modelName = modelName[1],
            apiKey = BuildConfig.apiKey,
        )
        val inputContent = content {
            image(image)
            text(question)
        }
        try {
            val response = generativeModel.generateContent(inputContent)
            return response.text ?: "No answer."
        } catch (e: ResponseStoppedException) {
            return "Error ${e.message}"
        } catch (e: ServerException) {
            return "Error ${e.message}"
        }
    }
Once you have the response from the Gemini LLM, it’s the simple task of creating a Compose UI to display the result:
class MainActivity : ComponentActivity() {
    override fun onCreate(savedInstanceState: Bundle?) {
        super.onCreate(savedInstanceState)
        setContent {
            BlundellTheme {
                Surface(
                    modifier = Modifier.fillMaxSize(),
                    color = MaterialTheme.colorScheme.background,
                ) {
                    Column(
                        horizontalAlignment = Alignment.CenterHorizontally,
                    ) {
                        Text("Gemini Android")
                        Image(
                            painterResource(id = R.drawable.image),
                            contentDescription = "",
                            contentScale = ContentScale.Fit,
                            modifier = Modifier.fillMaxWidth(),
                        )
                        var answer by remember { mutableStateOf("") }
                        Button(onClick = {
                            answer = "loading..."
                            CoroutineScope(
                                context = Dispatchers.IO + CoroutineExceptionHandler { _, throwable ->
                                    throwable.printStackTrace()
                                },
                            ).launch { // For tutorial only, use a ViewModel typically
                                answer = analyseImage(
                                    image = BitmapFactory.decodeResource(resources, R.drawable.image),
                                    question = "Extract the " +
                                            "power consumption (in watts), " +
                                            "temperature (in degrees celsius) " +
                                            "and relative humidity (RH %) from the image. " +
                                            "Answer in bullet points."
                                )
                            }
                        }) {
                            Text(text = "Analyse with Gemini")
                        }
                        Text(
                            text = answer,
                        )
                    }
                }
            }
        }
    }
}
Running the code above, you end up with this. Gemini LLM taking a look at the image and replying with the correct power consumption, temperature and humidity. Yay.
All code is available on GitHub here.
Any questions, you can find me on:
Threads @Blundell_apps
Enjoy!