After my blog post on describing an Android Gradle App with Robolectric JUnit tests. I follow up here with how to run these tests within your AndroidStudio. The outcome being faster feedback from your tests and great IDE integration.

Ok here we’ll explain how to create a run configuration that will run all the tests within your roboelectric tests folder, you can customise this to be selective about what tests to run if you wish so don’t panic. The instructions are very GUI heavy so it’s less talking more screenshots!
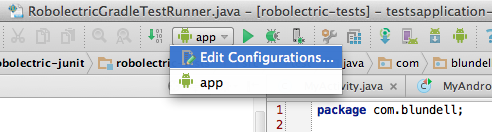
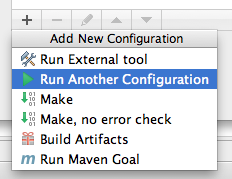
Goto your run configurations screen. This is where your run configruations are for building your app, running your tests, deploying your apk. You may not come here often as most of the time they are auto-generated for you.
Then firstly before we make our test running configuration we need to make another that will be a dependency. This is a gradle task that will refresh the codebase so that your tests will always run against the latest code changes in your app. Thanks to Mark Allison who figured this out when we where getting some strange test failures.
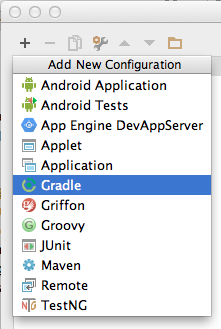
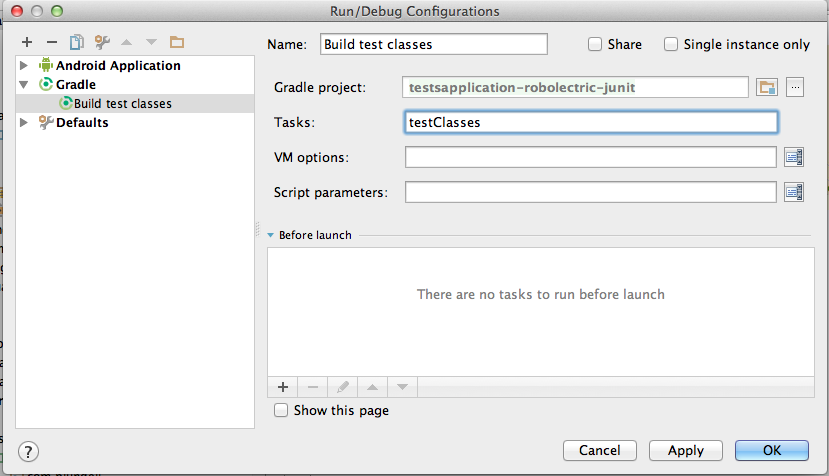
You want this config to run your gradle testClasses task like the below, the actual name of your configs is completely personal choice.
Next you create your JUnit config, now we are getting to it, running your tests!
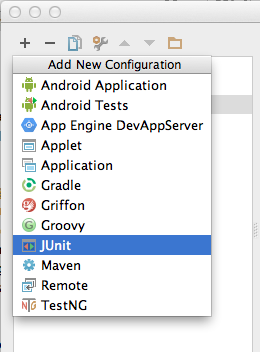
This config as we said at the start depends on the gradle config, therefore you need to add that as a dependency. (This + is near the bottom of the screen)
Now setup your config:
- Ensure dependency added as above.
- Give it a name.
- Test Kind: All in package, this is so we run all tests you can modify this if you only want to run 1 single or 1 subpackage of tests.
- Ensure the working directory is the module, this allows Robolectric to find your AndroidManifest and resources as it uses relative directory lookups.
- Use classpath of module: this is the module with the tests inside, ensuring it can find JUnit & other test dependencies
- Finally select ‘use alternative jre’ and point this to your Java install on the machine. This is the moneymaker that helps avoid some robolectric & android stub issues.

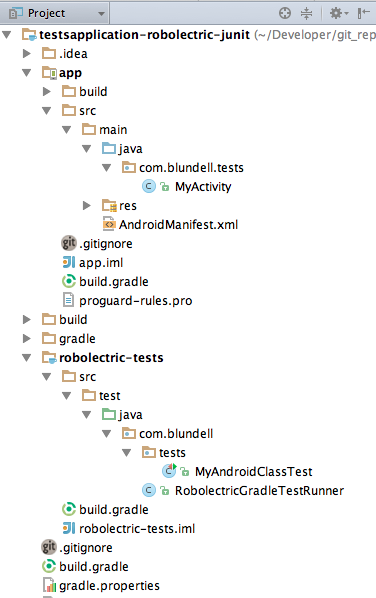
Here is a reminder of the project structure for those who did not come from the last blog post.
Thats it, click OK and you can run your config! When it runs you’ll first see it run the gradle script and then the output of your tests. Woohoo.


Also I’d like to thank Xavi Rigau my pairing partner who helped with this config and a lot of gradle things we hack together.
Questions, comments see below.
Is it possible to unit test package-private methods with this project structure?
package private? If you mean default visibility or package protected visibility, then yes as long as your package name/structure is identical you can test
This is a really excellent set of tutorials. It provides a pragmatic solution to the current (as of 11/14) landscape of android testing.
I just finished vetting what you guys put together and it’s exactly what I was looking for–thanks.
*** Note
With Robolectric 2.3, you no longer need that extra RobolectricGradleTestRunner… instead, you can use the following syntax
@Config(manifest = “../app/src/main/AndroidManifest.xml”)
This change requires the Working directory of the Test Configuration to point towards the test module’s folder.
Really great stuff!!! Cheers & Thank You
Could you explain the significance of running the testClasses task? Is this a built in task or did we define it earlier in the tutorial?
testClasses is a built in task of the java plugin, see here https://www.gradle.org/docs/current/userguide/java_plugin.html (search for “testClasses”)