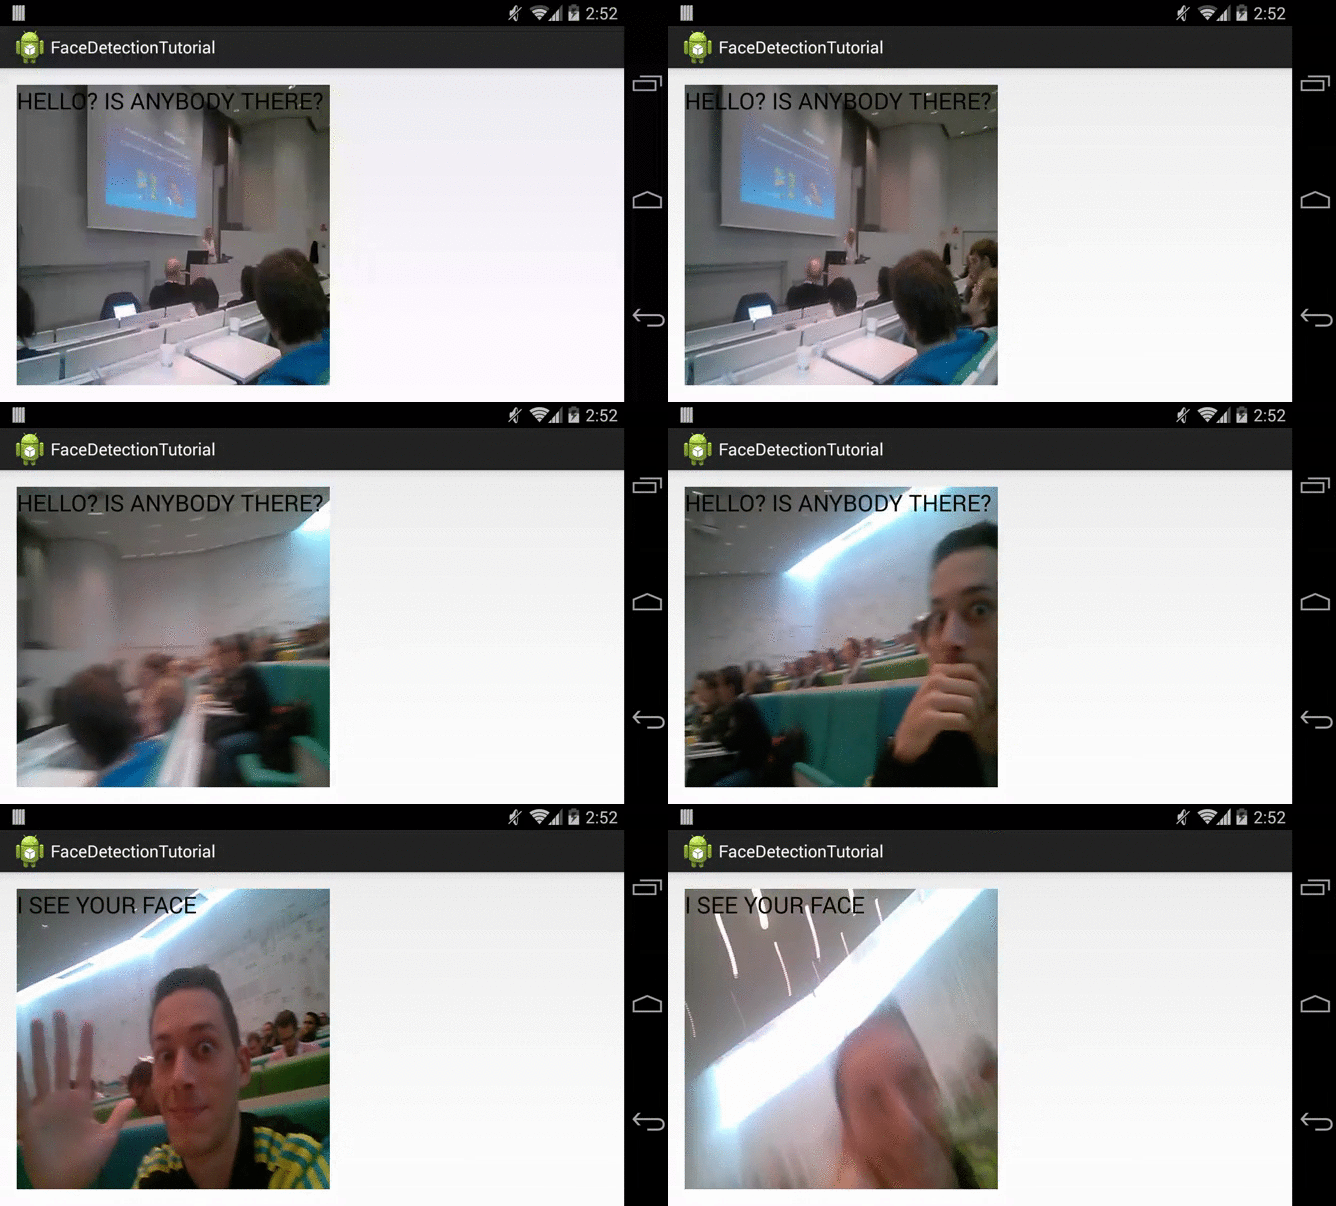
This is a continuation on my last face detection tutorial (here) that took you through the basics
of retrieving the camera and giving user feedback when a face is detected. Including best
practice when loading the camera, how to ensure you always release the camera when finished,
get callbacks when faces are seen and when faces are gone. If you have not read this tutorial
yet I would advise it before coming on to this, or if you need a recap you can find it here.
So now we know how to detect faces. It would be nice to give some feedback to the user of what
we are observing. In this tutorial I will explain how we can create a surface to display a preview
of what our camera see’s whilst it is detecting faces.

[Thanks for @xrigau for being my face model]
Adding a preview of the camera to our activity means we need a view in our layout.
Here we add a FrameLayout to our activity_main.xml and this can be the holder for the
camera preview we want to add programatically later.
<RelativeLayout xmlns:android="https://schemas.android.com/apk/res/android"
  xmlns:tools="https://schemas.android.com/tools"
  android:layout_width="match_parent"
  android:layout_height="match_parent"
  android:paddingLeft="@dimen/activity_horizontal_margin"
  android:paddingRight="@dimen/activity_horizontal_margin"
  android:paddingTop="@dimen/activity_vertical_margin"
  android:paddingBottom="@dimen/activity_vertical_margin"
  tools:context=".MainActivity">


  <FrameLayout
    android:id="@+id/helloWorldCameraPreview"
    android:layout_width="300dip"
    android:layout_height="300dip" />

  <TextView
    android:id="@+id/helloWorldTextView"
    android:textAppearance="?android:attr/textAppearanceLarge"
    android:text="@string/hello_world"
    android:layout_width="wrap_content"
    android:layout_height="wrap_content" />

</RelativeLayout>
As I said, we are rolling on the back of our previous code example. In our MainActivity we load the
camera Asynchronously, when this camera is retrieved we then know a front camera is
available and so we need to start getting our view ready to display what the camera sees.
This involves creating a surface and adding this surface view to our activities layout.
    @Override
    public void onLoaded(FaceDetectionCamera camera) {
        // When the front facing camera has been retrieved we still need to ensure our display is ready
        // so we will let the camera surface view initialise the camera i.e turn face detection on
        SurfaceView cameraSurface = new CameraSurfaceView(this, camera, this);
        // Add the surface view (i.e. camera preview to our layout)
        ((FrameLayout) findViewById(R.id.helloWorldCameraPreview)).addView(cameraSurface);
    }
Last time we initialised the FaceDetectionCamera inside of onLoaded, this time we have to create
our SurfaceView and so we delegate the initialisation to our CameraSurfaceView.
CameraSurfaceView is where the magic happens and this is the new class for this tutorial.
CameraSurfaceView extends SurfaceView and this allows you to draw a camera preview into your view hierarchy. SurfaceView can get callbacks for when a surface is created, changed or destroyed. We use these callbacks to pass the surface to our camera and the camera itself worries about drawing. This is the opposite of our last tutorial where we used a dummy surface to show the camera preview.
Now that we have a surface, we wait for the surface to be ready, once ready it is passed to the FaceDetectionCamera and this initialises itself using the surface to display what the camera preview is showing.
CameraSurfaceView.java
import android.annotation.SuppressLint;
import android.content.Context;
import android.view.SurfaceHolder;
import android.view.SurfaceView;

import com.blundell.tutorial.cam.FaceDetectionCamera;

@SuppressLint("ViewConstructor") // View can only be inflated programatically
public class CameraSurfaceView extends SurfaceView implements SurfaceHolder.Callback {

    private final FaceDetectionCamera camera;
    private final FaceDetectionCamera.Listener listener;

    public CameraSurfaceView(Context context, FaceDetectionCamera camera, FaceDetectionCamera.Listener listener) {
        super(context);
        this.camera = camera;
        this.listener = listener;
        // Listen for when the surface is ready to be drawn on
        this.getHolder().addCallback(this);
    }

    @Override
    public void surfaceCreated(SurfaceHolder holder) {
        // When the surface is ready to be drawn on
        // tell our camera to use this to show a preview
        camera.initialise(listener, holder);
    }

    @Override
    public void surfaceChanged(SurfaceHolder holder, int format, int width, int height) {
        if (surfaceDoesNotExist()) {
            return;
        }
        // When the surface changes we need to re-attach it to our camera
        camera.initialise(listener, holder);
    }

    private boolean surfaceDoesNotExist() {
        return getHolder().getSurface() == null;
    }

    @Override
    public void surfaceDestroyed(SurfaceHolder holder) {
        // empty. Take care of releasing the Camera preview in your activity.
        // (done in FrontCameraRetriever for us)
    }
}
In summary, because of the architecture of the first tutorial adding a preview of the camera is pretty simple. Just swapping the DummySurfaceHolder for a CameraSurfaceHolder. This also gives you a place to access the surface and camera meaning if you wanted you could overlay other graphics on the preview or amend transformations.
Source code is available here. Questions or comments ask below!