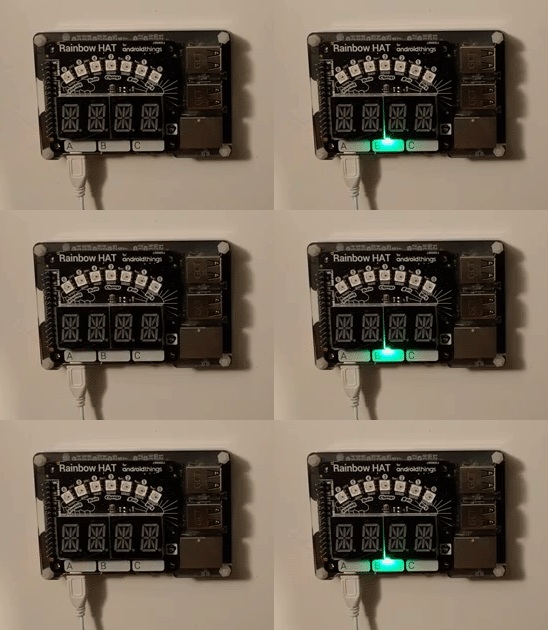
This blog will show you how to use the LEDs of the Rainbow hat peripheral. In learning about how to make the LEDs blink, we will use the GPIO protocol which can come in handy for numerous other sensors and peripherals.
Hardware Prerequisite:
We have the Rainbow Hat connected to the top of our raspberry pi.
Software Prerequisite:
An AndroidThings project already set up in Android Studio, if you aren’t sure how to get your project to this point you can view the ‘first Android Things app’ blog for instructions.
Let’s get started.
First we create an instance of PeripheralManagerService. This is the AndroidThings SDK class that allows us to open connections to different board pins using the different available protocols.
PeripheralManagerService service = new PeripheralManagerService();
Using this instance, we want to open a GPIO connection with the pin address of the Green LED. This can be found here. When we open this connection we are given back a GPIO bus variable that will now allow us to communicate using the AndroidThings SDK GPIO class.
public class MainActivity extends Activity {

    private static final String GREEN_LED_PIN = "BCM19";

    private Gpio bus;

    @Override
    protected void onCreate(Bundle savedInstanceState) {
        super.onCreate(savedInstanceState);

        PeripheralManagerService service = new PeripheralManagerService();

        try {
            bus = service.openGpio(GREEN_LED_PIN);
        } catch (IOException e) {
            throw new IllegalStateException(GREEN_LED_PIN + " bus cannot be opened.", e);
        }
   }
}
Opening a connection to a pin is capturing this pin as your resource, and like with all resource management it is good practice to release resources once you have finished with them. Also if we have an open connection to a pin, no other code can open a connection to that same pin until we close our connection.
Since we opened the connection to our pin in the onCreate method, we should use the symmetrically matching pair from the Android Lifecycle to close the connection. Therefore we close the GPIO bus connection in onDestroy using this code.
    @Override
    protected void onDestroy() {
        try {
            bus.close();
        } catch (IOException e) {
            Log.e("TUT", GREEN_LED_PIN + " bus cannot be closed, you may experience errors on next launch.", e);
        }
        super.onDestroy();
    }
Once we have a connection to the GPIO bus, we now have to configure our pin for GPIO output to the LED.
We set the direction to OUT INITIALLY HIGH. This means we are telling the GPIO bus that we expect to use this pin as an output. I.e. we expect to send information to the peripheral on this pin. The initially high part of that constant ensures that the initial state is set correctly as we configure the bus. (This information can be found in documentation or datasheets like this)
We set the active type to HIGH. Most LEDs are active high and because it’s not documented we will go with HIGH which I know because of trial and error, is correct.
// in onCreate
try {
            bus.setDirection(Gpio.DIRECTION_OUT_INITIALLY_HIGH);
            bus.setActiveType(Gpio.ACTIVE_HIGH);
        } catch (IOException e) {
            throw new IllegalStateException(GREEN_LED_PIN + " bus cannot be configured.", e);
        }
Now that our GPIO pin is configured and ready. We want to be turning the LED on and off at a fixed interval. To achieve this we need to have a looping bit of code for, on, off, on, off etc.
In Android one way to creating a repeating code sequence is to use a Handler and a Runnable. A handler allows you to send and process messages to a selected Threads message queue. We do that using this code.
        HandlerThread handlerThread = new HandlerThread("MyBackgroundThread");
        handlerThread.start();
        ledToggleHandler = new Handler(handlerThread.getLooper());
Notice when we create the Handler, we specify that the Main Looper is the thread whose queue we want to use. This means after the initial post and each time the postDelayed method is called our toggle LED Runnable is added the Queue of the MainThread. We can use this turn our LED on and off in a loop.
With the toggle LED runnable we can now query and then update the state of our LED. To get the current state of our LED we can use the code below. Because we set the active type to high in the configuration, this means a return value of true is the active type and this means the LED is on.
    private final Runnable toggleLed = new Runnable() {
        @Override
        public void run() {
            boolean isOn;
            try {
                isOn = bus.getValue();
            } catch (IOException e) {
                throw new IllegalStateException(GREEN_LED_PIN + " cannot be read.", e);
            }
            try {
                if (isOn) {
                    bus.setValue(false);
                } else {
                    bus.setValue(true);
                }
            } catch (IOException e) {
                throw new IllegalStateException(GREEN_LED_PIN + " cannot be written.", e);
            }
            ledToggleHandler.postDelayed(this, TimeUnit.SECONDS.toMillis(1));
        }
    };
We know if the LED is currently on or off, so we use that to toggle its state. It’s written verbosely with an if else statement because it reads better and makes it more obvious what is happening. Setting the GPIO bus value to true turns the LED on and setting it to false turns the LED off.
Now post the runnable in onStart and cancel it onStop to form our loop.
    @Override
    protected void onStart() {
        super.onStart();
        ledToggleHandler.post(toggleLed);
    }


    @Override
    protected void onStop() {
        ledToggleHandler.removeCallbacks(toggleLed);
        super.onStop();
    }
That’s it!
Let’s run our app and check your Rainbow hat to show the blinking LED is working.
You now understand how the Android Things GPIO communication with output peripherals works. You can interface with hardware LEDs and control their state, making them turn on and off. This knowledge also transfers to other GPIO output peripherals such as other types of LEDS or switches.
The source is on GitHub and all the code is available here.
If you are more of an audible learning, or prefer video content. You can check out my Android Things introductory video course on Caster.io.
