This tutorial will show you the skeleton of an Android application that uses the Gradle build system and runs JUnit tests on java classes.
If your here and reading this, I assume you already know Android code runs on Dalvik and the SDK’s used when developing on a computer are stubs. (Hence the Stub! exception when you try and run JVM tests on an Android class).
The concept of this project is to separate your code into two modules the first is your Android application module and this has a dependency on the Android SDK. The second is a plain java module that has no dependency on Android only on Java, the catch being your first module has a dependency on the second. Therefore the Android code can see the java code but the java code cannot see Android! This is a good thing and allows you to write your applications domain login in pure Java and of course let’s you write JVM JUnit tests that run super fast for instant feedback.
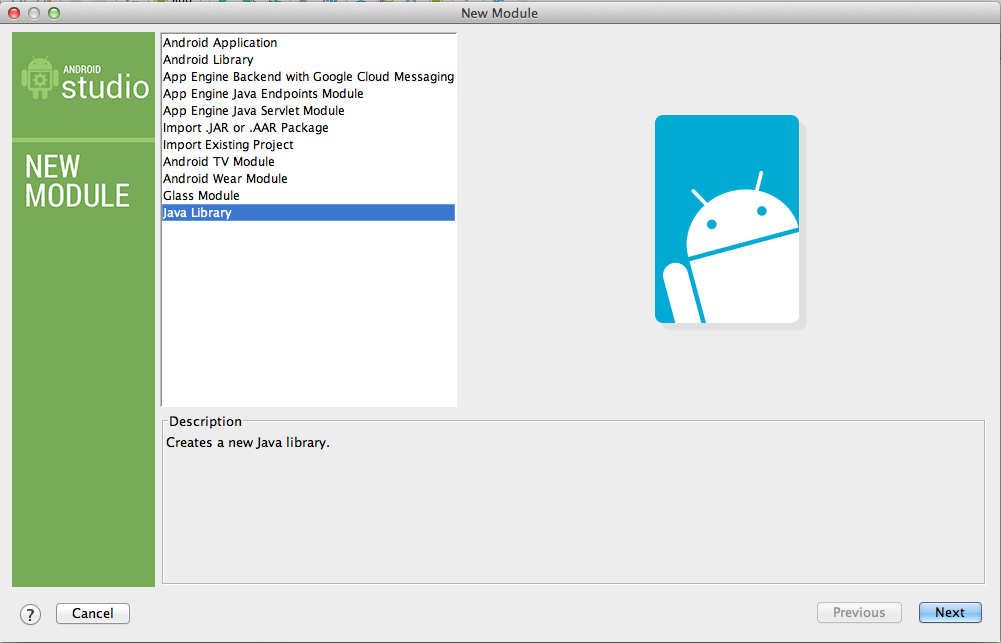
Android studio has a wizard for creating new modules, you’ll want to pick the Java only type for your “core” module.
Once you have done this, your settings.gradle file will be updated showing the new module. This lets gradle know the module exists.
include ':app', ':core'
The second thing you need to do is add the dependency from the app (Android module) to the core (Java module). This is done in your app modules build.gradle:
dependencies {
    compile project(':core')
}
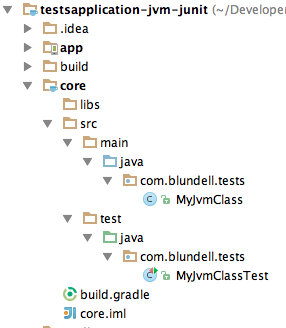
Lastly you’ll want to set up your core java module for testing. We are now in standard java world. So tests sit in /test/java and your code in /main/java.
Now that you have a pure java module, you can leverage the whole java ecosystem and can add static code analyses like checkstyle, findbugs or PMD & also get code coverage of your java module with jacoco or emma. These can be added as simple plugins with minimum setup.
Now add any dependencies you want to code java module build.gradle:
apply plugin: 'java'

dependencies {
    testCompile 'junit:junit:4.+'
}
And write your tests:
public class MyJvmClass {

    public String getHelloWorld() {
        return "Hello World";
    }
}

public class MyJvmClassTest {

    @Test
    public void testHelloWorld() throws Exception {
        MyJvmClass myJvmClass = new MyJvmClass();

        String text = myJvmClass.getHelloWorld();

        assertEquals(text, "Hello World");
    }
}
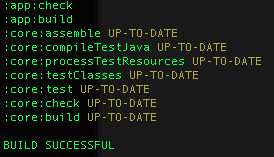
Thats it! To run your tests you can use one of these:
- ./gradlew test
- ./gradlew check
- ./gradlew build
test just runs your tests, check would run tests plus checkstyle etc, and build compiles everything & checks & tests
Source Code
The example project is available on GitHub Check it out here


Nice article! I did something similar in an older project and here’s my opinion on it:
– It works best for classes that don’t depend on any android lifecycle events. While it is possible to pass through lifecycle events and implement a whole activity/fragment logic, I personally found it to require too much overhead to interface and mock pretty much anything that is done in or to the activity.
-Examples of things I would consider doing this way are: deserializing json, regex stuff and as an exception possibly some more complex (e.g. multithreaded stuff) where the benefits outweigh the overhead and most of the things are probably interfaced anyways.
-I was surprised how much android specific code I use without realising. Starting from xml parsing and sparse arrays etc.
-Putting classes in two different modules solely depending on the used imports is kind of unaesthetic.
-Knowing nothing about the android part also means losing flavor/buildtype goodies.
I’m can see the benefits, but I’m not sure of the use cases yet. I looked at a simple activity logic I wrote in this manner a while back and while it looks clean, it also feels over engineered.
I’d appreciate your opinion on real life use cases, where would you go this route and where would you use robolectric instead?
Like you said, I use it for parsing, tasks, backend domain implementation. You’re wrong in that you can still use flavor/buildtype goodies. Basically if you write proper OO software then the java module is for your domain specific code.
Very useful, thank you!