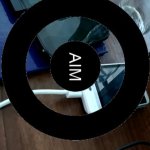
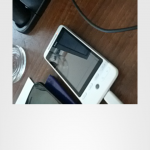
This tutorial shows you how to use the devices camera inside your application. It also shows how you can have a custom UI for your camera and overlay images on top of the camera preview.
I’ll apolgise now my graphics aren’t the best, but they convey the idea and concepts of what is possible.
The code has been written for intuitive reading, not for production testing use. As usual it is heavily commented so excuse the brevity of the actual post. Any questions ask away!
References used for this tutorial:
Android Developer . Camera
Android Developer . Loading Bitmaps
What we are going to do:
- Create an Activity to start the camera and show the captured image
- Display the camera within our app
- Add a custom UI to the camera
Ok here .. we .. go
This is nice and straight forward, first we create an Activity that will check if the camera is available on the device. If it is the user can click a button to load the camera. We also display the result of taking a photo (we will be using startActivityForResult).
MainActivity.java
package com.blundell.tut.cameraoverlay.ui;

import com.blundell.tut.cameraoverlay.FromXML;
import com.blundell.tut.cameraoverlay.R;
import com.blundell.tut.cameraoverlay.util.BitmapHelper;
import com.blundell.tut.cameraoverlay.util.Log;

import android.app.Activity;
import android.content.Intent;
import android.content.pm.PackageManager;
import android.os.Bundle;
import android.view.View;
import android.widget.ImageView;
import android.widget.TextView;

/**
 * Gives a simple UI that detects if this device has a camera,
 * informing the user if they do or dont
 *
 * This also receives the result of a picture being taken and displays it to the user
 *
 * @author paul.blundell
 *
 */
public class MainActivity extends Activity {

    private static final int REQ_CAMERA_IMAGE = 123;

	@Override
    public void onCreate(Bundle savedInstanceState) {
        super.onCreate(savedInstanceState);
        setContentView(R.layout.activity_main);


        String message = "Click the button below to start";
        if(cameraNotDetected()){
        	message = "No camera detected, clicking the button below will have unexpected behaviour.";
        }
        TextView cameraDescriptionTextView = (TextView) findViewById(R.id.text_view_camera_description);
        cameraDescriptionTextView.setText(message);
    }

    private boolean cameraNotDetected() {
		return !getPackageManager().hasSystemFeature(PackageManager.FEATURE_CAMERA);
	}

	@FromXML
    public void onUseCameraClick(View button){
    	Intent intent = new Intent(this, CameraActivity.class);
    	startActivityForResult(intent, REQ_CAMERA_IMAGE);
    }

	@Override
	protected void onActivityResult(int requestCode, int resultCode, Intent data) {
		if(requestCode == REQ_CAMERA_IMAGE && resultCode == RESULT_OK){
			String imgPath = data.getStringExtra(CameraActivity.EXTRA_IMAGE_PATH);
			Log.i("Got image path: "+ imgPath);
			displayImage(imgPath);
		} else
		if(requestCode == REQ_CAMERA_IMAGE && resultCode == RESULT_CANCELED){
			Log.i("User didn't take an image");
		}
	}

	private void displayImage(String path) {
		ImageView imageView = (ImageView) findViewById(R.id.image_view_captured_image);
		imageView.setImageBitmap(BitmapHelper.decodeSampledBitmap(path, 300, 250));
	}
}
activity_main.xml
<LinearLayout xmlns:android="https://schemas.android.com/apk/res/android"
    xmlns:tools="https://schemas.android.com/tools"
    android:layout_width="match_parent"
    android:layout_height="match_parent"
    android:orientation="vertical" >

    <TextView
        android:id="@+id/text_view_camera_description"
        android:layout_width="wrap_content"
        android:layout_height="wrap_content" />

    <Button
        android:layout_width="fill_parent"
        android:layout_height="wrap_content"
        android:onClick="onUseCameraClick"
        android:text="@string/button_use_camera" />

    <ImageView
        android:id="@+id/image_view_captured_image"
        android:layout_width="300dip"
        android:layout_height="250dip"
        android:layout_gravity="center"
        android:contentDescription="@string/content_desc_image_just_taken"
        android:scaleType="fitXY" />

</LinearLayout>
When we click through to the CameraActivity a few things happen. First we have a custom SurfaceView that we draw the camera onto. This custom surface view is then put in a FrameLayout allowing us to put other views on top of it. When drawing the custom surface view we are using the camera preview, meaning we have access to the camera. Note: only one app can access the camera at a time, so it is possible that it will not be available and also if we don’t treat it correctly it won’t be available for others to use when we have finished. We will manage our use of the camera from our Activity (to make use of the Activity lifecycle).
Checkout the custom surface view below, we watch out for a callback when the surface has been created i.e. when our Activity is shown, and then attach our camera preview. If you wanted to do other funky things like rotate UI components when the phone changes orientation you would do it here in the surfaceChanged method.
CameraPreview.java
package com.blundell.tut.cameraoverlay.ui.widget;

import com.blundell.tut.cameraoverlay.util.Log;

import android.content.Context;
import android.hardware.Camera;
import android.util.AttributeSet;
import android.view.SurfaceHolder;
import android.view.SurfaceView;

/**
 *
 * @author paul.blundell
 *
 */
public class CameraPreview extends SurfaceView implements SurfaceHolder.Callback {

	private Camera camera;
	private SurfaceHolder holder;

	public CameraPreview(Context context, AttributeSet attrs, int defStyle) {
		super(context, attrs, defStyle);
	}

	public CameraPreview(Context context, AttributeSet attrs) {
		super(context, attrs);
	}

	public CameraPreview(Context context) {
		super(context);
	}

	public void init(Camera camera) {
		this.camera = camera;
		initSurfaceHolder();
	}

	@SuppressWarnings("deprecation") // needed for < 3.0
	private void initSurfaceHolder() {
		holder = getHolder();
		holder.addCallback(this);
		holder.setType(SurfaceHolder.SURFACE_TYPE_PUSH_BUFFERS);
	}

	@Override
	public void surfaceCreated(SurfaceHolder holder) {
		initCamera(holder);
	}

	private void initCamera(SurfaceHolder holder) {
		try {
			camera.setPreviewDisplay(holder);
			camera.startPreview();
		} catch (Exception e) {
			Log.d("Error setting camera preview", e);
		}
	}

	@Override
	public void surfaceChanged(SurfaceHolder holder, int format, int width, int height) {
	}

	@Override
	public void surfaceDestroyed(SurfaceHolder holder) {
	}
}
The CameraPreview is then used in our CameraActivity, don’t forget to instantiate it using setCamera, this is where I differ from the default Google example of using the camera, as our layout it kept in the XML file compared to google creating UI components in onCreate and adding them to the layout hierarchy programatically.
CameraActivity.java
package com.blundell.tut.cameraoverlay.ui;

import static com.blundell.tut.cameraoverlay.util.CameraHelper.cameraAvailable;
import static com.blundell.tut.cameraoverlay.util.CameraHelper.getCameraInstance;
import static com.blundell.tut.cameraoverlay.util.MediaHelper.getOutputMediaFile;
import static com.blundell.tut.cameraoverlay.util.MediaHelper.saveToFile;

import java.io.File;

import com.blundell.tut.cameraoverlay.FromXML;
import com.blundell.tut.cameraoverlay.R;
import com.blundell.tut.cameraoverlay.ui.widget.CameraPreview;
import com.blundell.tut.cameraoverlay.util.Log;

import android.app.Activity;
import android.content.Intent;
import android.hardware.Camera;
import android.hardware.Camera.PictureCallback;
import android.os.Bundle;
import android.view.View;

/**
 * Takes a photo saves it to the SD card and returns the path of this photo to the calling Activity
 * @author paul.blundell
 *
 */
public class CameraActivity extends Activity implements PictureCallback {

	protected static final String EXTRA_IMAGE_PATH = "com.blundell.tut.cameraoverlay.ui.CameraActivity.EXTRA_IMAGE_PATH";

	private Camera camera;
	private CameraPreview cameraPreview;

	@Override
	protected void onCreate(Bundle savedInstanceState) {
		super.onCreate(savedInstanceState);
		setContentView(R.layout.activity_camera);
		setResult(RESULT_CANCELED);
		// Camera may be in use by another activity or the system or not available at all
		camera = getCameraInstance();
		if(cameraAvailable(camera)){
			initCameraPreview();
		} else {
			finish();
		}
	}

	// Show the camera view on the activity
	private void initCameraPreview() {
		cameraPreview = (CameraPreview) findViewById(R.id.camera_preview);
		cameraPreview.init(camera);
	}

	@FromXML
	public void onCaptureClick(View button){
		// Take a picture with a callback when the photo has been created
		// Here you can add callbacks if you want to give feedback when the picture is being taken
		camera.takePicture(null, null, this);
	}

	@Override
	public void onPictureTaken(byte[] data, Camera camera) {
		Log.d("Picture taken");
		String path = savePictureToFileSystem(data);
		setResult(path);
		finish();
	}

	private static String savePictureToFileSystem(byte[] data) {
		File file = getOutputMediaFile();
		saveToFile(data, file);
		return file.getAbsolutePath();
	}

	private void setResult(String path) {
		Intent intent = new Intent();
		intent.putExtra(EXTRA_IMAGE_PATH, path);
		setResult(RESULT_OK, intent);
	}

	// ALWAYS remember to release the camera when you are finished
	@Override
	protected void onPause() {
		super.onPause();
		releaseCamera();
	}

	private void releaseCamera() {
		if(camera != null){
			camera.release();
			camera = null;
		}
	}
}
For overlaying your UI, you simply use a FrameLayout in your layout and add whatever views you want there:
activity_camera.xml
<?xml version="1.0" encoding="utf-8"?>
<FrameLayout xmlns:android="https://schemas.android.com/apk/res/android"
    android:layout_width="fill_parent"
    android:layout_height="fill_parent" >

    <com.blundell.tut.cameraoverlay.ui.widget.CameraPreview
        android:id="@+id/camera_preview"
        android:layout_width="fill_parent"
        android:layout_height="fill_parent" />

    <ImageView
        android:layout_width="fill_parent"
        android:layout_height="fill_parent"
        android:contentDescription="@string/content_desc_overlay"
        android:src="@drawable/cam_target" />

    <Button
        android:layout_width="wrap_content"
        android:layout_height="wrap_content"
        android:layout_gravity="right|center_vertical"
        android:onClick="onCaptureClick"
        android:padding="@dimen/padding_medium"
        android:text="@string/button_capture_text" />

</FrameLayout>
Finally there are few helper classes for poking the cameras state, loading bitmaps and saving your images to the filesystem. These are pretty self explanatory and commented in the source links below.
Enjoy!
Source Downloads:


Congradulations! A great tutorial! Helped me very much.
Hi blundell can you help me to do a merge betwen capture and image png and save…
Hey R U Getting The solution Of Your this problem..?
if got it..
please Tell me.