I warn you this is a long blog post as I am walking you through and explaining the full steps for an Android In App Purchase.
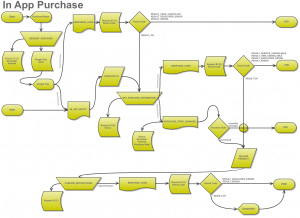
I’ve recently had to deliver in app billing for Android, during the development I did some in-depth research of how it works and what the different stages of the purchase process are. Below is a diagram showing the workflow to make a purchase, it shows the entry and exit points for in app purchase, also detailing what data needs to be stored at what point in the process.
The things it doesn’t cover are, how to check if in app billing is available on the device (this is assumed) and also what to do when you receive a cancelled or refunded purchased (these are just ignored).
I’m not a UML / workflow / diagram guru so I’ve probably used all the wrong symbols in all the wrong places, however I have been consistently wrong so it should make sense when explained!
Take a quick look then I’ll try and walk you through the process:
Explanation of the symbols
Six symbols are mainly used:
This is the symbol for when Google send you a Broadcast that something about the purchase has changed (you catch it in a broadcast reciever):

This is showing that you need to store this data (in memory/in a database – its upto your implementation):

This shows that a decision needs to be made based upon some data that you have just stored:

This is a request that you need to send to Google Play (it is sent to the Google Play service you bind to using the AIDL):
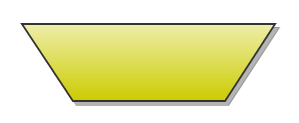
I think I’ve used this symbol wrongly but I needed something different, it’s representing data being passed along to be used by the next flow step.

This symbol is used to show data is to be shown on the phone screen, it is when the UI is changing / needs changing:

Breakdown of the Flow Chart
There are two entry points into an In App Purchase, this is the first thing to get your head around.
- A user can click your item and select purchase from within the app
- An item could have been previously purchased but not completed, purchased on another device, purchased then cancelled, purchased then refunded
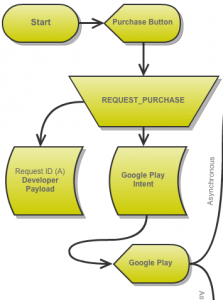
Entry point 1 is the more common use case, this is how your In App Billing would start:
The user clicks your purchase button (or however you wish to sell your item).
You send a REQUEST_PURCHASE request to the Google Play service. n.b. What you have to understand is your talking to the Google Play application on your phone therefore when you send it a request you will get an instant response (with some information you can use) as well as a delayed response off the server.
So when you send REQUEST_PURCHASE you will instantly receive a RequestID, this can be used to match up the asynchronous response to the request you just sent. (that way you know what response matches what request).
You will also receive an intent, you use this intent to start the UI of the Google Play application. This is then shown to the user and they can choose to purchase your item or to cancel the request. The Google Play application will then send off your request to the Google servers and you will receive further responses asynchronously (after an unknown amount of time).

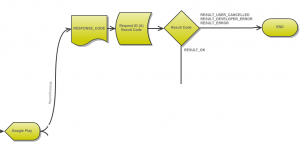
When the user has selected to purchase your item (Buy Now $4.99), Google Play sends your app two Broadcasts the first being a RESPONSE_CODE if this is RESULT_OK then you can continue and await the second Broadcast. However if this is not RESULT_OK it means for one reason or another the purchase has failed at this point. This can be that the user cancelled or some other failure. When you receive this you can cancel the transaction at this point and the user is back in your app with no item.
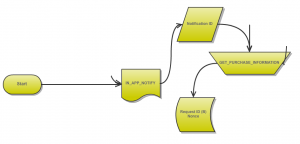
The second broadcast you receive is an IN_APP_NOTIFY this is where the second entry point joins in. As I’ve said above you can receive this for multiple reasons but you can treat them all the same at this point.
Upon receiving IN_APP_NOTIFY you instantly send another request called GET_PURCHASE_INFORMATION, this is asking Google “for what purchase did you just notify me about?”. You should start to see the pattern now, when you send this request you get an instant reply where you save the RequestID (so you can match up the asynchronous replies later) and you will go on to receive 2 asynchronous replies.
The first reply as usual is a RESPONSE_CODE, here again you can receive RESULT_OK (in which case you wait for the second async reply), if it is not RESULT_OK you can drop out of the purchase process without any further work, because at this point you will keep receiving an IN_APP_NOTIFY until you confirm to google you have dealt with it (that comes at the end). So dropping out is ok because another IN_APP_NOTIFY will be sent with Google and in that case you try again!
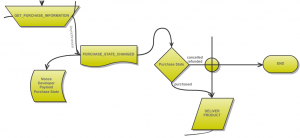
The second reply is PURCHASE_STATE_CHANGED this tells you how the purchase is going, if it is purchased, cancelled or refunded. When you first did the REQUEST_PURCHASE you can add a developer payload to your request, this is sent back at this point so you can match your request to your purchase.
With receiving RESULT_OK from your latest RESPONSE_CODE and getting ‘purchased’ from your PURCHASE_STATE_CHANGED you now have the authorisation to download/unlock your item. At this point it is up to you, if you need to download the item from your server do it now this gives you the opportunity to not confirm the purchase to google if your download fails, this is known as a two phase commit . If you don’t confirm the purchase you will (at a later point) receive another IN_APP_NOTIFY and you can start again.
If the item has been successfully delivered to the phones storage, you should now go on to confirm the purchase:
Confirming the purchase is telling Google that you have given your item to the user and they no longer need to send you reminders (IN_APP_NOTIFY) to deliver the item.
This follows the familiar pattern, send your CONFIRM_NOTIFICATION you will get an instant requestID using this to match up your asynchronous RESPONSE_CODE, you only get the one async reply this time. If this is RESULT_OK thats it your done, update your UI with however you are showing your user their new purchased item. If it is another result (i.e. an error) you haven’t confirmed the purchase so don’t show the item and wait for the next IN_APP_NOTIFY.
_______________________________________________________________
Now that you’ve read through the whole process go back and look at the In App Purchase Overview and you should be able to follow your purchase all the way.
I hope this helps in explaining In App Purchase on Android for you, I use this diagram as a reference when implementing purchasing and would recommend you do the same.
Enjoy!
I created the diagram using gliffy.com, well recommended.


Great work.
Good explanation for beginners, like me.
Bundle of Thanks.
This article valid only for v2 IAB
It’s NOT v3
correct