This is an Android Things quick fix explanation of using an extra GPIO pin on the Rainbow Hat for the Raspberry Pi. I couldn’t find this solution written in any documentation. So here I am to share it with you.
When you use the Rainbow Hat it takes all the pins of the Raspberry Pi. This is because it’s a hat and thats the idea of them. It consumes the pins for use to add functionality. However what if you want to add your own sensors on top of the hat? Well fortunately the Rainbow Hat exposes its own set of pins that you can connect even more peripherals to. Unfortunately none of these pins are labelled as GPIO.
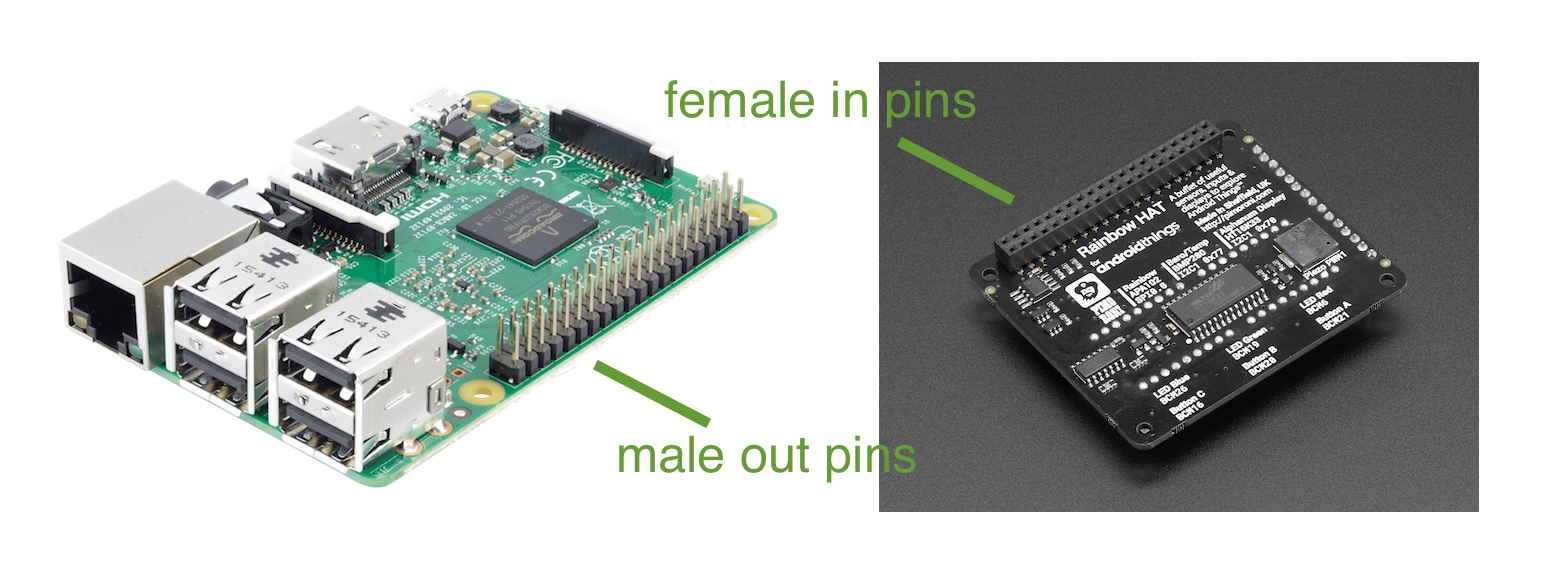
As a reminder here is the Raspberry Pi with its pins, and the back on the Rainbow Hat that will consume all of these pins, including all GPIO. (even though the official docs say the Rainbow Hat only uses 13 pins and the Raspberry Pi has 17 GPIO pins.)
Here is the top of the rainbow hat, notice you have extra pins for PWM, UART, I2C & SPI.
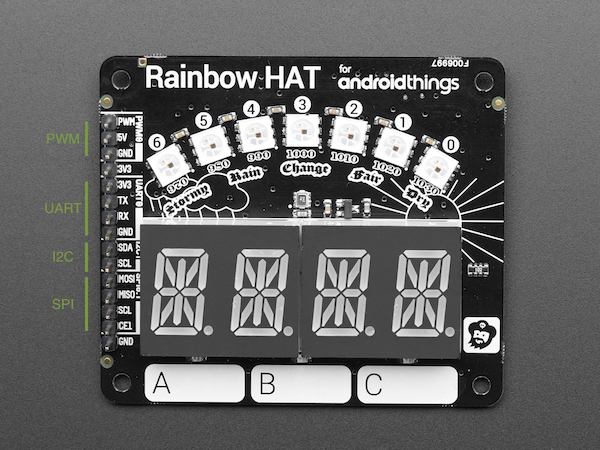
None of these extra pins are for GPIO! Don’t fret though you can use PWM pin as GPIO! Thus allowing you to add an extra peripheral that requires a GPIO pin to the Raspberry Pi Rainbow Hat.
To reference this PWM pin as GPIO out in Android Things you can use the following code:
Gpio driver = new PeripheralManagerService().openGpio("BCM18");
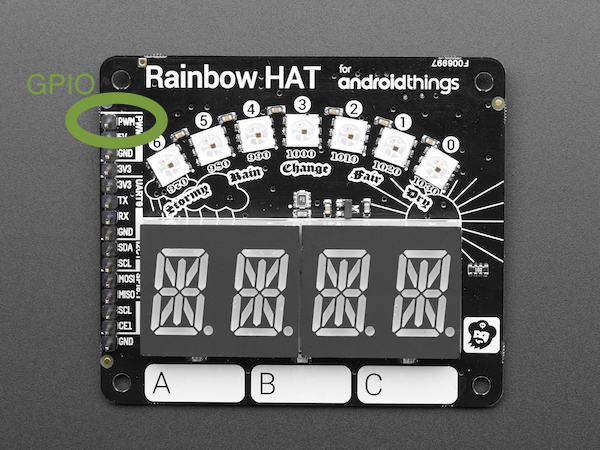
Now if you add your GPIO sensor to the top pin of the Rainbow Hat which is labelled PWM (inside of the PWM0 bigger label), your peripheral should be detected.
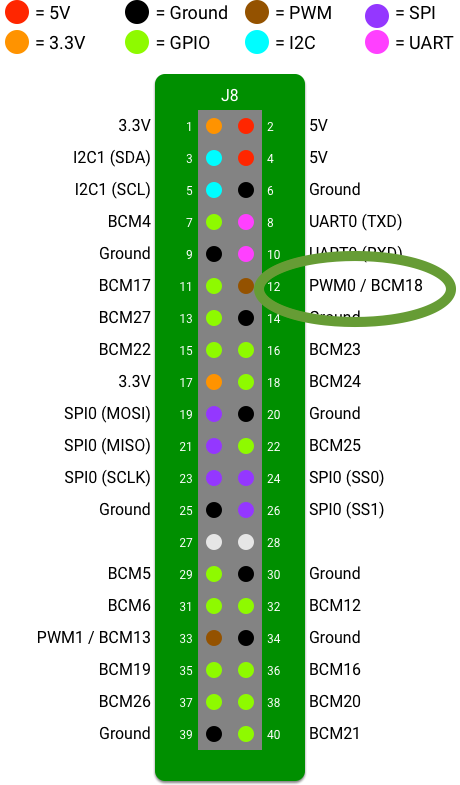
We know that the PWM pin is BCM18 by using the Raspberry Pi’s pin out diagram (and this PWM0 circled correlates with the Rainbow Hat pin labels that we see in the picture above).
Thats it! Enjoy hacking away at more Android Things hardware and software.
Any questions just ask.