This tutorial will show you the skeleton of an Android application that uses the Gradle build system and runs Espresso Instrumentation tests on Android classes.

This follows on from my tutorials about Robolectric JUnit tests & JVM JUnit tests, you can have Espresso tests without Robolectric or JVM tests, but the idea is they all test on different levels of your application architecture. Therefore for a SOLID well tested application you’ll want all the tests! I discussed more about the different levels of testing in my Droidcon Berlin testing architecture talk. Found here on slideshare.
First off Espresso is a library by Google not an actual type of testing. Therefore when I say ‘espresso tests’ I am actually talking about functional tests. These are tests that integrate with the android system and most the time require a real device or emulator to be able to be ran.
**optional paragraph**
Espresso simplifies the testing of the Android UI, the rest of this post is about how to set up Espresso in your gradle project. If you want to learn more about writing Espresso tests I would recommend the espresso wiki. Remember Espresso being a library it runs on top of the Android testing framework, this framework has been expanding recently and you can use any of the children of ActivityTestCase or AndroidTestCase to run your tests. This gives you options for running (on device) unit tests, android tests, service tests, single activity tests. It’s a bit outside the scope of this blog so I would recommend reading the API’s & javadoc’s for the previous links. In the example below we will use ActivityInstrumentationTestCase2 that will allow use to start an Activity then use Espresso to test our button & listview.
Step 1 Espresso is not released as a maven central dependency. Therefore Google expect you to download the lib & copy it into your /libs directory. We are using Gradle & enjoy the dependency resolution so we don’t want to do that! There are two options, firstly Novoda keep a repository with the espresso libs on them found here, secondly J Wharton has also kindly uploaded the espresso libs to maven central found here having to change the name space to allow the upload. We are going to use the Novoda repo with original namespace. In the build.gradle of your root project you will have to add the Novoda repo, like so:
// Top-level build file where you can add configuration options common to all sub-projects/modules.

buildscript {
    repositories {
        jcenter()
    }
    dependencies {
        classpath 'com.android.tools.build:gradle:0.12.+'

        // NOTE: Do not place your application dependencies here; they belong
        // in the individual module build.gradle files
    }
}

allprojects {
    repositories {
        jcenter()
        maven {
            url "https://ci.novoda.com/maven/releases" // THESE 3 LINES NEED ADDING
        }
    }
}
Now that you can resolve the Espresso library jar you need to tell your Android build you are using Espresso. This is done in your apps build.gradle (compared to the root build.gradle). You do this by declaring what test runner your android tests use. This has to be the fully qualified package and class name of the test runner. (If you extended this testrunner you would change this.)
testInstrumentationRunner "com.google.android.apps.common.testing.testrunner.GoogleInstrumentationTestRunner"
app/build.gradle
apply plugin: 'com.android.application'

android {
    compileSdkVersion 20
    buildToolsVersion "20.0.0"

    defaultConfig {
        applicationId "com.blundell.tests"
        minSdkVersion 15
        targetSdkVersion 20
        versionCode 1
        versionName "1.0"
        testInstrumentationRunner "com.google.android.apps.common.testing.testrunner.GoogleInstrumentationTestRunner"
    }
}

dependencies {
    androidTestCompile "com.google.android:android-espresso-bundled:1.1.0-SNAPSHOT"
}
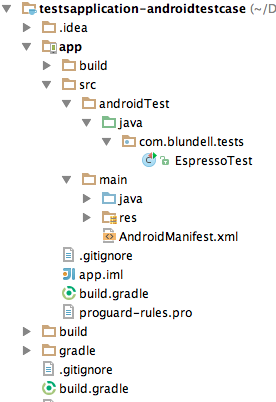
Now that you have Espresso up and running it can be used in any standard Android instrumentation test. Instrumentation tests sit under the src/androidTest directory of your android module. This folder used to be called instrumentTest but they have recently changed this.
Here is an example that clicks a button to load some items into a ListView, it then clicks the ListView and asserts that the TextView in the activity is updated with the item selected from the list.
package com.blundell.tests;

import android.test.ActivityInstrumentationTestCase2;

import com.google.android.apps.common.testing.ui.espresso.Espresso;
import com.google.android.apps.common.testing.ui.espresso.action.ViewActions;
import com.google.android.apps.common.testing.ui.espresso.assertion.ViewAssertions;
import com.google.android.apps.common.testing.ui.espresso.matcher.ViewMatchers;

import org.hamcrest.Matchers;

/**
 * https://code.google.com/p/android-test-kit/wiki/EspressoStartGuide
 * https://developer.android.com/reference/android/test/ActivityInstrumentationTestCase2.html
 * <a href="https://d.android.com/tools/testing/testing_android.html">Testing Fundamentals</a>
 * <p/>
 * Below I have purposefully not included static imports so you can see exactly what classes are in use.
 * For readability once the below is understood I would use static imports
 */
public class EspressoTest extends ActivityInstrumentationTestCase2<MyActivity> {
    public EspressoTest() {
        super(MyActivity.class);
    }

    @Override
    public void setUp() throws Exception {
        super.setUp();
        getActivity();
    }

    public void testEspressoClickingListViewPopulatesTextView() {
        //Given the ListView is populated
        Espresso.onView(ViewMatchers.withId(R.id.my_button)).perform(ViewActions.click());

        // When I click on the an item in the ListView
        Espresso.onData(Matchers.allOf(Matchers.is(
                Matchers.instanceOf(String.class)), Matchers.is("Grape")))
                .perform(ViewActions.click());

        // Then the TextView shows the correct text
        Espresso.onView(ViewMatchers.withId(R.id.my_hello_text_view))
                .check(ViewAssertions.matches(ViewMatchers.withText(Matchers.containsString("Grape"))));
    }
}
Thats it!
Remember your instrumentation tests do not run as part of the normal ./gradlew build command you need to explicitly run them. With the connectedAndroidTest command.
./gradlew connectedAndroidTest
Source Code
The example project is available on GitHub check it out here.
Comments or questions just post below.
Thanks for the tutorial. I downloaded your example project, installed the app, and then ran the espresso test. It all works. But I have one issue. The app will be deleted after the test has finished. I tested this on a Nexus 5 running Lollipop and a Nexus 7 2013 running Kitkat 4.4. Is this intended behaviour?
Thanks Ben
Yeah this is standard instrumentation test behaviour
You can also run the Instrumentation Tests and see the results in Android Studio directly, just create a new “Run configuration” using the “Android Tests” template and specifying the Google Test Runner
https://i.imgur.com/yve48pl.png